Open tools for circuit design - Learning QUCS, KiCad and Freecad
The Wah Pedal
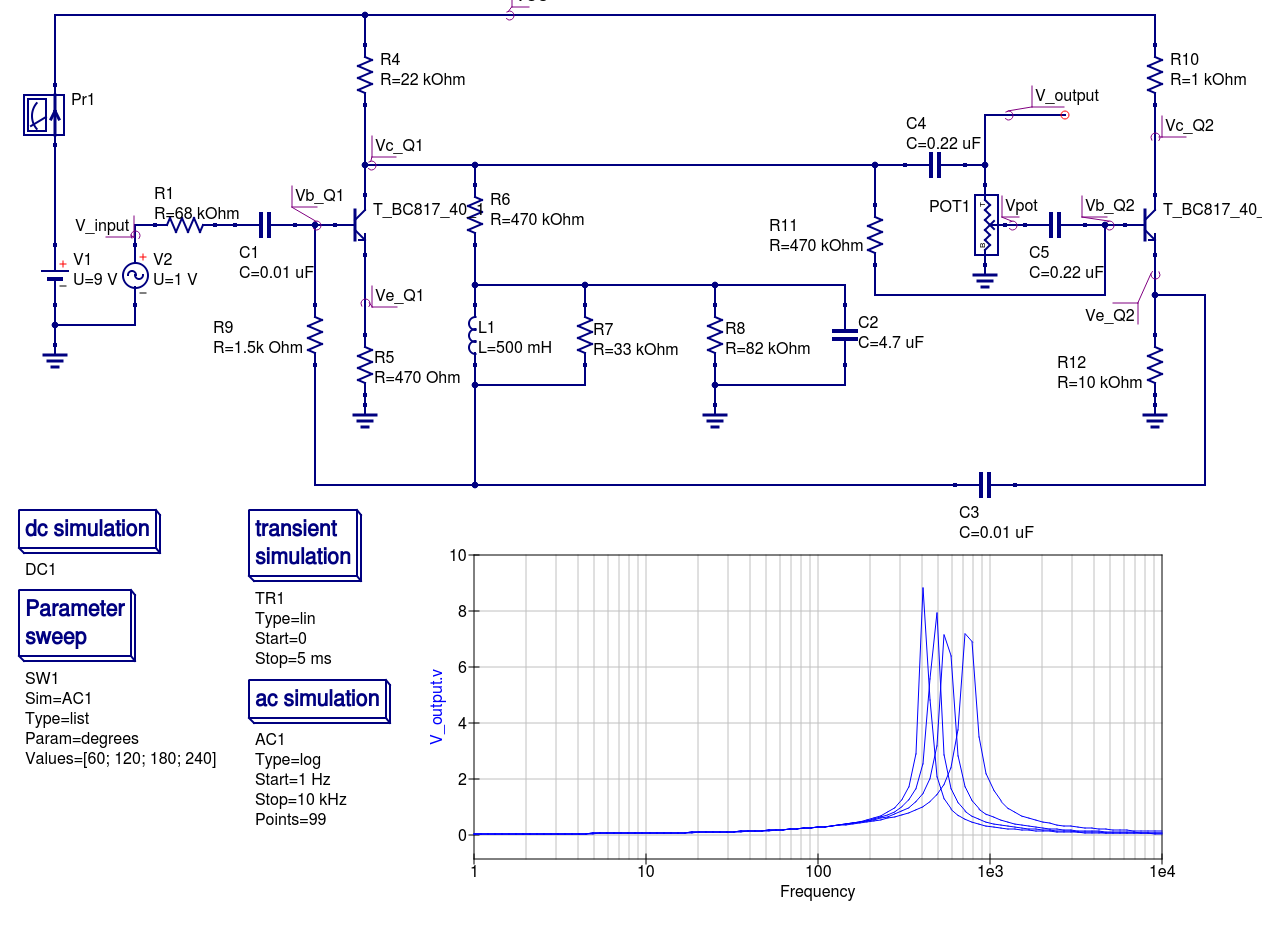
Not so long ago a friend showed me a little circuit which I thought was quite interesting (The Wah Pedal), a simple variable active filter with a couple of transistors but with no variable reactive components. So I thought eventually, some day, I should take the time to understand it more deeply, simulate it and put it in a little PCB; a great example project for learning a couple of new design tools. Well I did!
The Final Design
The Circuit simulation
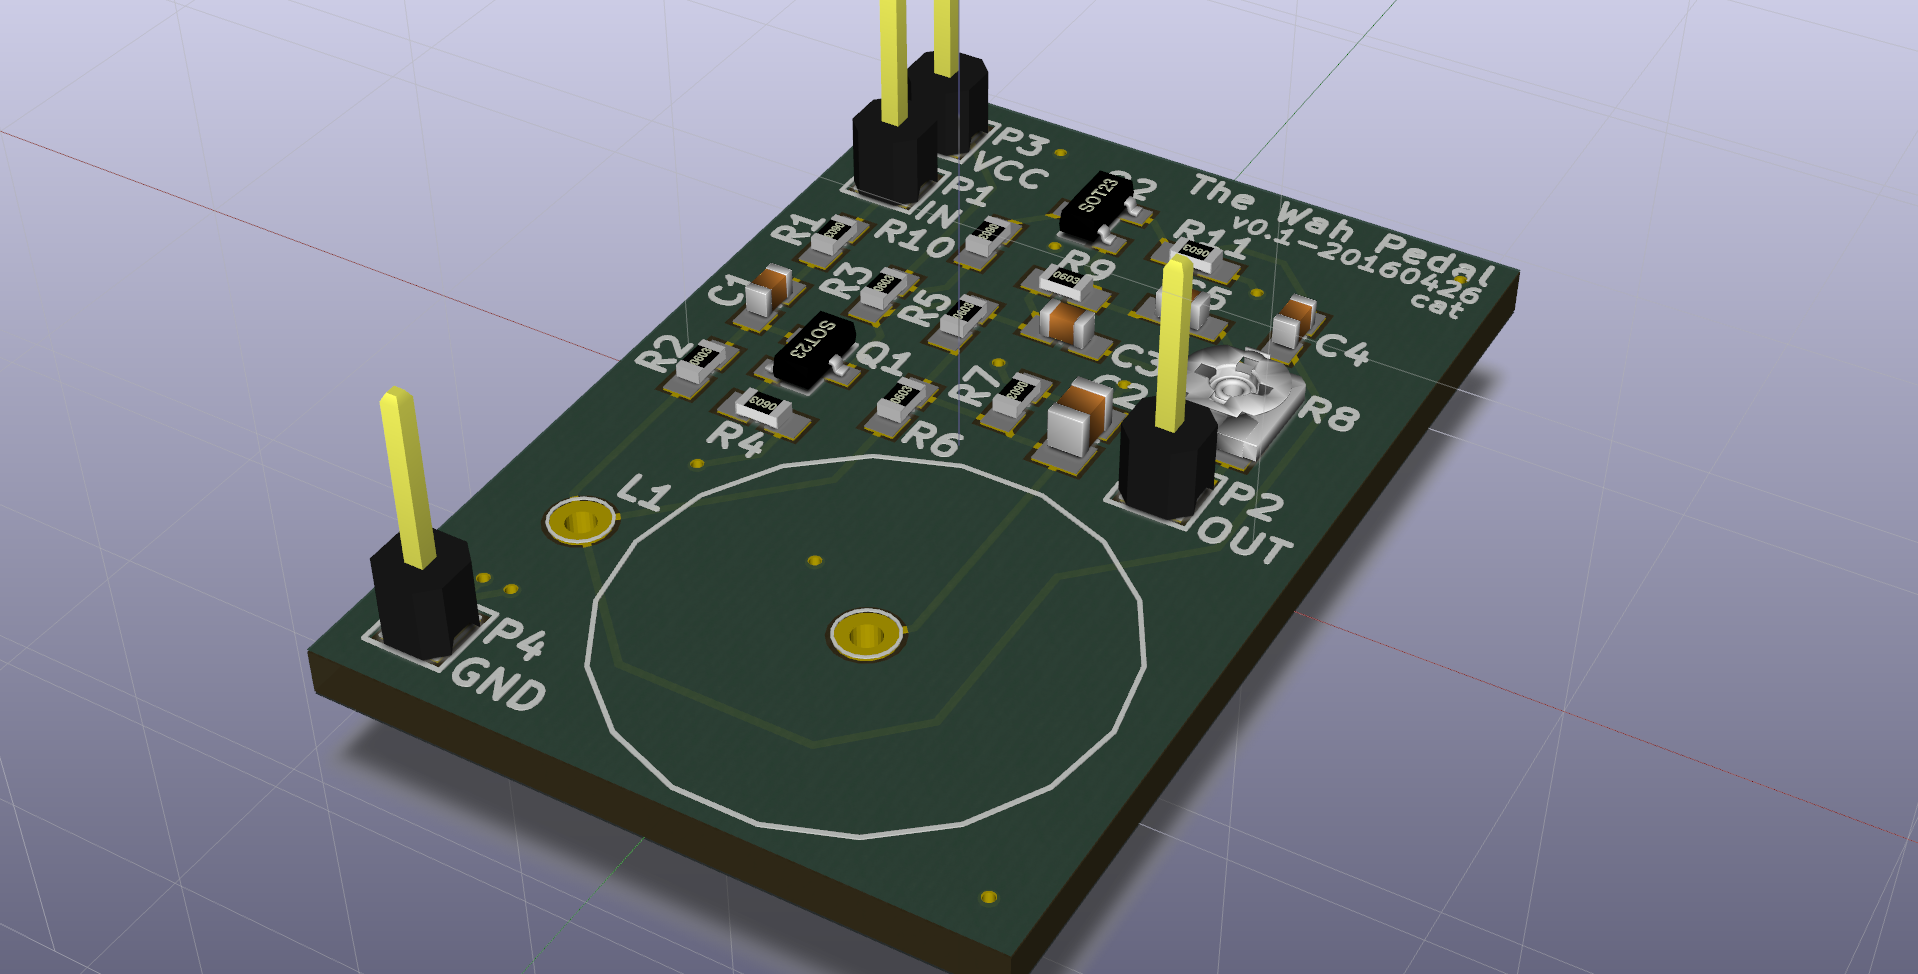
The Board Layout
- Note that stitching vias around the ground plane is somewhat counterintuitive.
The 3D Model
Below you can find more information about how this board came about. Specifically about the open tools I used and the learning process. At the end you can find the design linked_files.
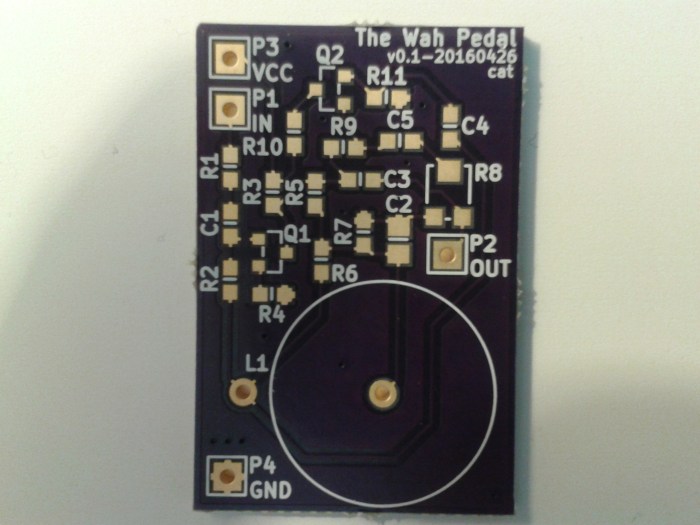
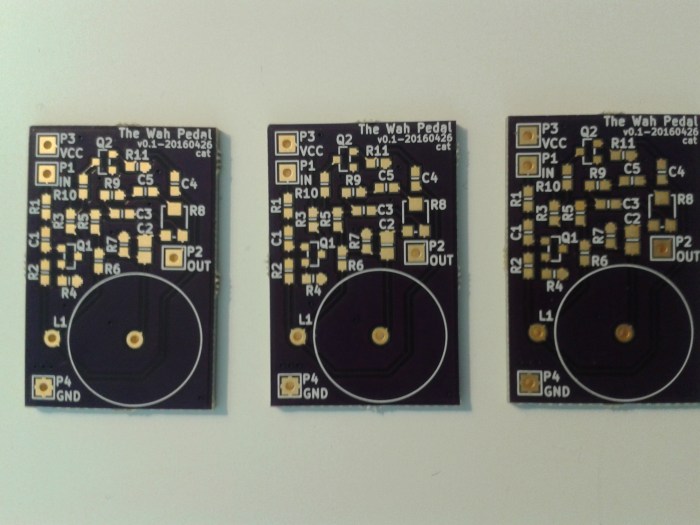
The Printed Circuit Boards
Choosing the tools
For a while now I have been meaning to find a set of open (FLOSS) tools that I can learn and use for my future hardware projects. Specially I was looking for circuit simulation, PCB design and 3D CAD modeling software.
I came across the following viable alternatives (though there are a lot more):
After some research (I use Open Hub quite a bit) and some tinkering with each software I settled on: QUCS, KiCad and FreeCAD.
Learning QUCS
I went over to their documentation page and completed their getting started tutorial; It was well written and easy to follow. In Qucs, the user interface and the overall process is quite intuitive so I was up and running in no time.
After completing the tutorial I started my own QUCS project for simulating the Wah Pedal: finding the component models, wiring the schematic, setting up the sources, preparing the simulations …etc. Except for a few hiccups here and there (for help, you can join their mailing list), things went pretty smooth. No complaints.
Learning KiCad
The process of learning KiCad to use it for my own project was as follows (your mileage may vary):
-
Read the Getting Started Guide and Complete the KiCad example project.
-
Briefly read all the docs about every KiCad software component (e.g. KiCad Project Manager, EESchema, PCBNew …etc). It really helps to know how everything fits together (perfect opportunity to grab a latte and spend a relaxed afternoon reading about KiCad).
- Learn about KiCad Libraries, and how to build your own components (don’t
listen to the rants :) ):
- Schematic Library Editor
- Footprint Library Editor
- Create your own personal component’s library here’s why
- Here are the Kicad Library Conventions (KLC).
- Here are my own library conventions (very similar to KLC).
- Here are my libraries for reference (these are constantly changing).
Try to always build your libraries on a need to have basis, do not build parts you don’t need (more parts does not mean better libraries). Otherwise they will go unmaintained and mix with the good parts and clutter your libraries making them useless. (i.e. you don’t know which parts are good anymore)
After you build your libraries for every component you need in the circuit, you can proceed to create the schematic project in EESchema, assign footprints to finally plot the Gerbers for manufacturing.
Learning FreeCAD
In KiCad you need some 3D models to assign to your footprints such that the whole board can be rendered nicely and you can inspect for mistakes before sending the board to the fab.
Normally, KiCad 3D component models are built with Wings 3D, but we need FreeCAD to import the .stp linked_files we get from the manufacturers (plus I have a little bit of experience working with FreeCAD).
My learning process for FreeCAD (as it relates to KiCad) went like this:
-
FreeCAD Getting Started Guide: Quick Read.
-
Part Design Basic Tutorial: Super helpful, but optional if you are in a rush.
- Building 3D component models using the manufacturer CAD STEP file.
- Build and export directly for KiCad using the StepUp Tool.
- Building Kicad component models from scratch based on the manufacturer
datasheet.
- Build the component model yourself using FreeCAD.
- Export the model to Wings 3D for coloring and creating the .wrl file for compliance with KiCad.
After you are done building your models and you have exported the .wrl linked_files that KiCad needs, open up the footprint editor in KiCad and assign your 3D models to their respective footprints (footprint properties -> 3D models).
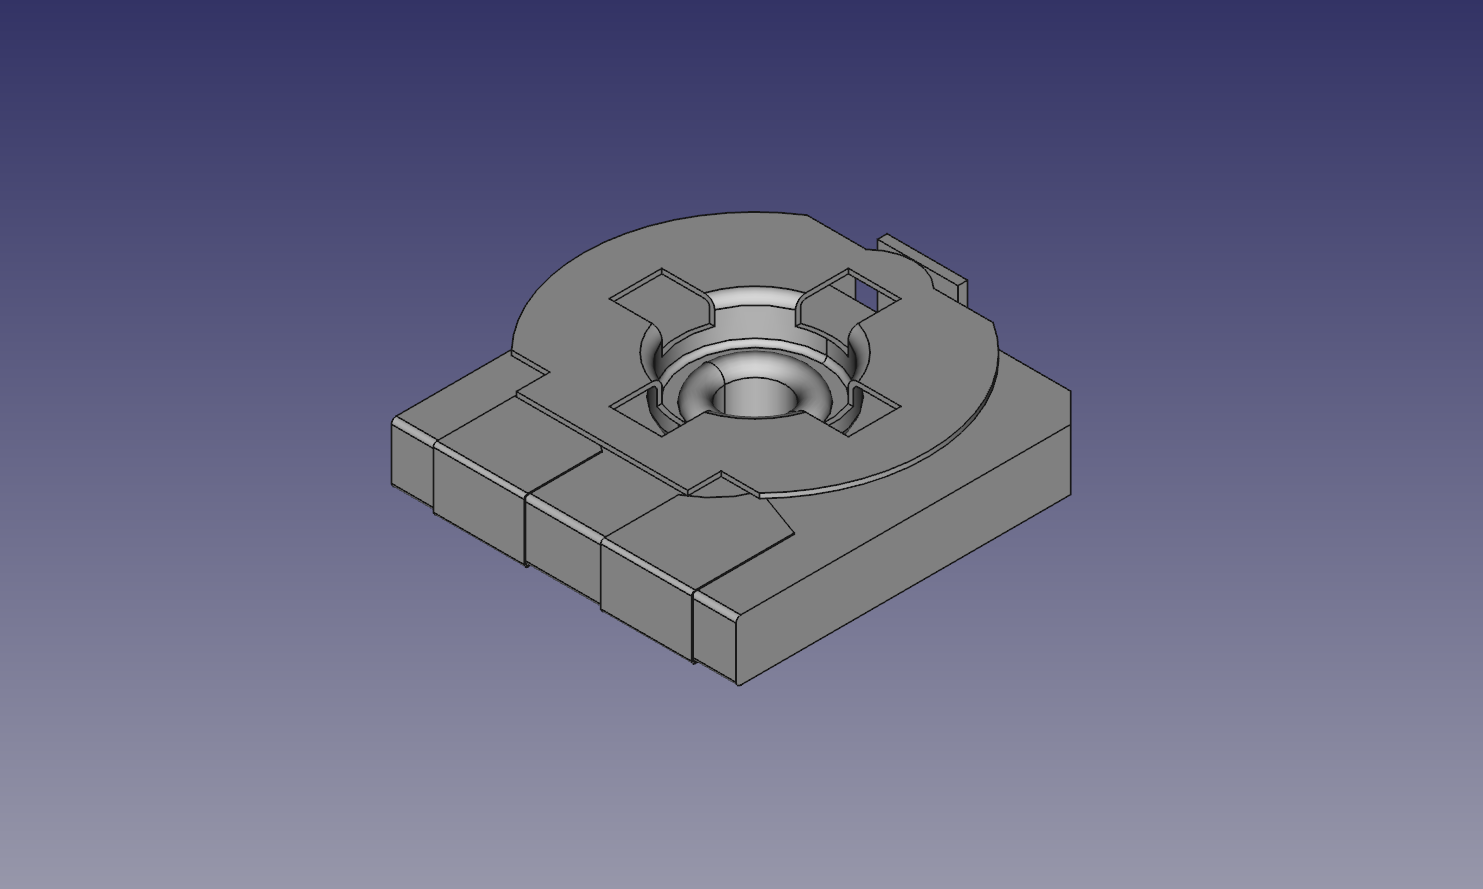
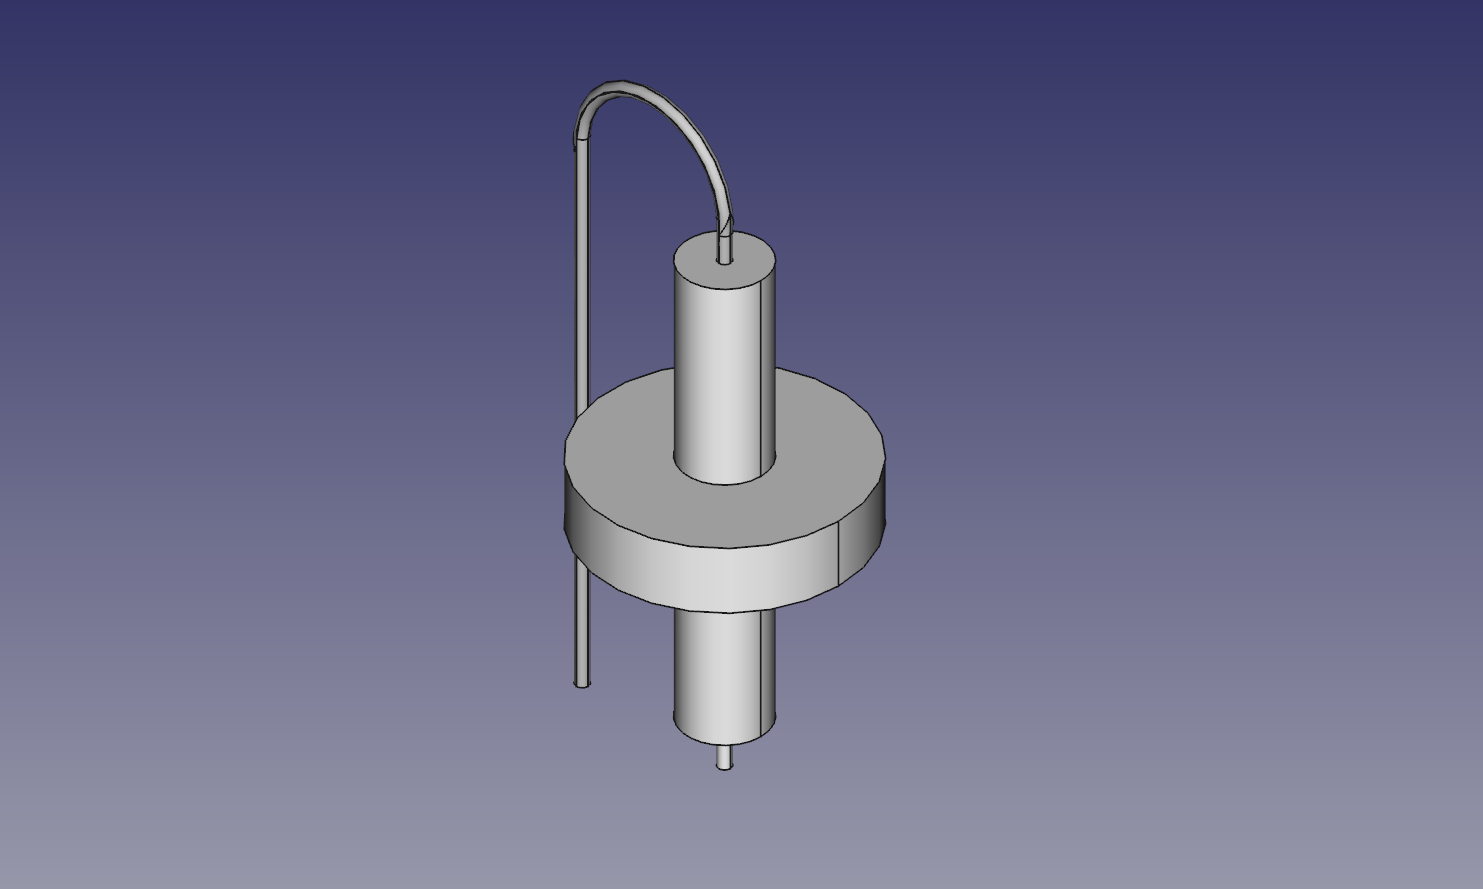
Here are some models I built while learning:
The linked_files
And finally,
-
Here are the design linked_files for the Wah Pedal Project.
-
And the shared project ready for fabrication through OSH Park.
Hope it helps someone, somewhere, anywhere? :)
Enjoy and share with others!
Feedback? questions? Please let me know in the comments below.
Leave your comments below (or comment directly here).
Thank you for your feedback.